Library Table

This was my first project using a number of techniques:
Mortise and tenon
Edge joining without dowels
Epoxy
Miter joints
It came out VERY well, all things considered. Nearly perfectly square!
Pictures
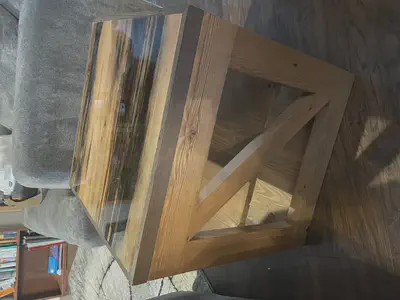 | 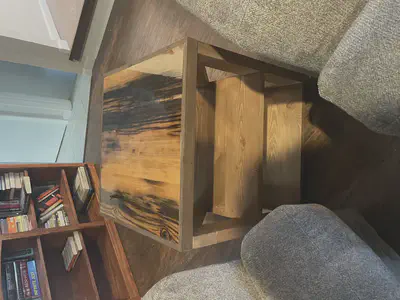 |
| Finished! SO SHINY! | |
Lessons Learned
Materials
- Reclaimed/old growth cedar is amazing to work with.
Measuring and Cutting
For all final cuts/planes, sneak up on them as you get closer to the final stage instead of cutting/planing to the exact size you need at the outset. This gives you some nice buffer to work with when things go wrong unexpectedly.
Cutting mortises with a router is really hard to get exactly right, which you need to to get things to line up exactly. You really need a dedicated jig for this joint.
Cutting tenonas with a router is hard, but somewhat easier than cutting mortises. But again, to get things to line up perfectly, you need absolute precision, and I don’t have that/pretty sure you need a jig for this too t3o get it.
Don’t cut 45 degree miter cross cuts using a beveled blade angle–unless it is exactly 45, things won’t line up. Instead, use a sled/miter guage set at 45 degrees and a vertically aligned blade–works much better.
Miter cuts for cross-supports like in this project are hard to guage in terms of how long something needs to be; sneaking up on the final cut is absolutely essentialy.
Staining
- The General Finishers’ stain I tried from Rockler was much more finicky than the “regular” stains I get from Menards; not sure the final color/look was any better either. Probably will just go with the Menards brand in the future.
John Harwell
Researcher and Engineer
Experienced embedded systems engineer whose research interests include multi-agent modeling and behaviors, swarm intelligence, bio-inspired algorithms and multi-robot systems, and computational optimization.